
How To Change Oil In A Harley-Davidson®

If you love your bike, change its oil on a regular basis. Period. If you ever have to question whether or not to change your oil, just err on the side of caution and do it. Of course, Durango Harley-Davidson® has some of the best parts and service professionals around. Here's a nice guide for those who'd rather do it themselves.
I've heard plenty of people say that their bike leaks oil all the time so they are constantly adding oil and believe that it must be clean, right? No. While it is a common misconception, adding oil and never changing it all out at once is not the same as changing your oil. Think of it this way: If you had a tub without a drain, and you washed yourself in the same water every day without ever changing it; only adding water to it to keep it at a level high enough to wash in, the water would be very dirty by the end of a week, and eventually you wouldn't even want to bathe in it at all. That's what happens to a motor when the oil is never changed.
One of the properties of good oil is its ability to trap and contain contaminants and particulate matter that develop in every internal combustion powerplant. Time, extensive heat, changing weather conditions, and a variety of other factors can degrade oil - and it never stops. I still abide by the traditional 3000 miles or every six months rule for changing oil, and I'll do it even more often if my bike has been ridden hard for extended periods of time. The cleaner a motor's oil is kept, the longer it will stay healthy and in good running condition.
The filter needs to be changed whenever the oil is changed. The filter is like a washcloth in our bathtub analogy. Sure, you used soap and water to scrub with, but after awhile the washcloth gets dirty too. The same is true of an oil filter; it stops being effective when contaminants are trapped in its inner pleats. If a filter is allowed to get extremely dirty, it will stop working altogether - and allows oil to flow through a bypass valve (built into most modern filters
It requires extra horsepower to force oil through the bypass, which means the motor oil is no longer doing its job of trapping particles and protecting your motor. A clogged filter also creates parasitic drag which means your bike is running with a few less ponies- and nobody wants that.
Changing the oil and filter for a Harley® is a relatively easy procedure. All the aspects of the bike that are required to be tinkered with for the process are easily accessible and really only require a few simple hand tools: a screwdriver, filter wrench of some kind, drain pan, and possibly a funnel (if you don't have a steady hand). If you acquire all the necessary fluids and filter before hand, it shouldn't take a newbie more than a half hour to change the oil and filter, and that includes hand-washing afterwards.
-
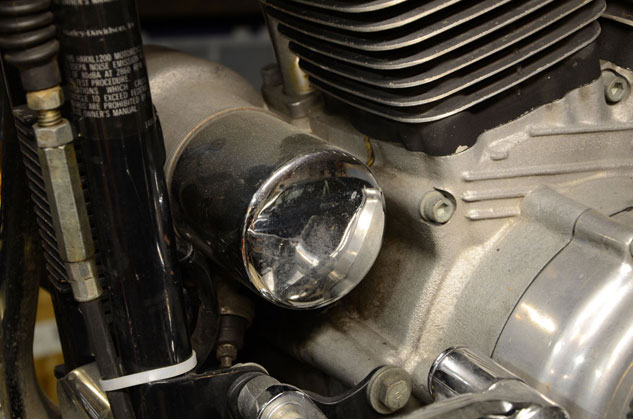
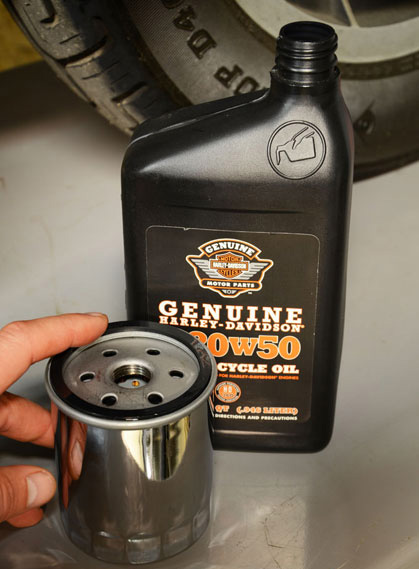
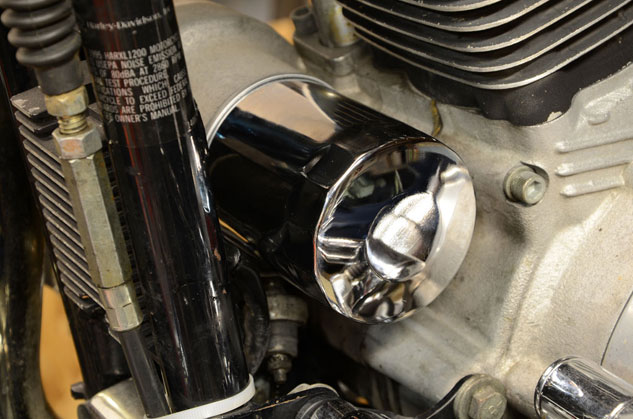
1 The oil filter of a Harley-Davison® Sportster is located just behind the downtubes and immediately in front of the cases and front cylinder of the motor. Usually, the filters are chrome or black, but occasionally they are white.
-
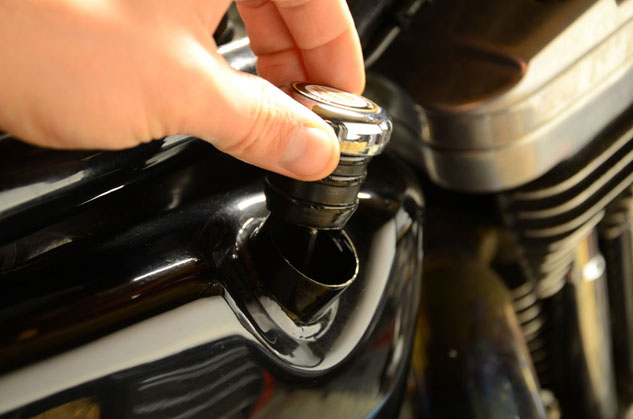
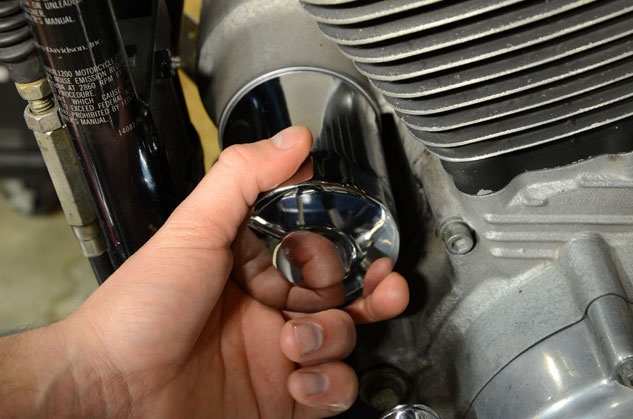
2 Start the oil change by venting the system, and remove the oil filler cap from the oil tank located on the right side of the bike underneath the seat.
-
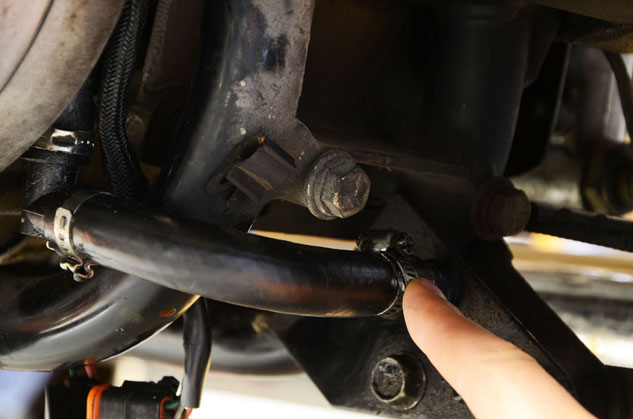
3 Next, find the drain tube. It helps to use a frame jack for tool access underneath the bike, but it is not required. There is a hose with a screw-type hose clamp attached to it (all the other hose connections are crimped) just behind the primary and in front of the rear tire.
-
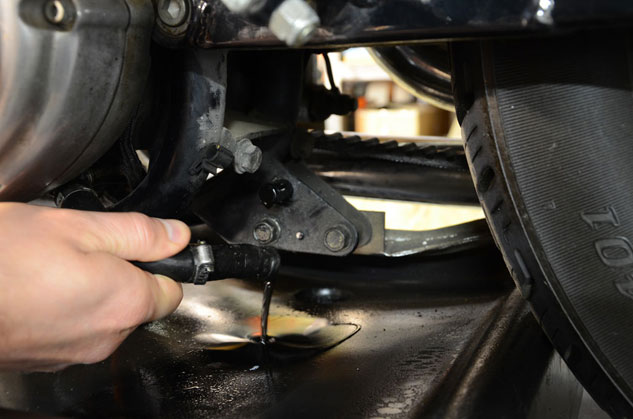
4Position a drain pan underneath the drain tube to catch the oil. Then, unfasten the hose clamp with a screwdriver. Pull off the hose from the frame-mounted plug and allow a few minutes for the tank to drain completely. Once the oil has stopped draining, replace the hose on the plug, and re-tighten the hose clamp.
-
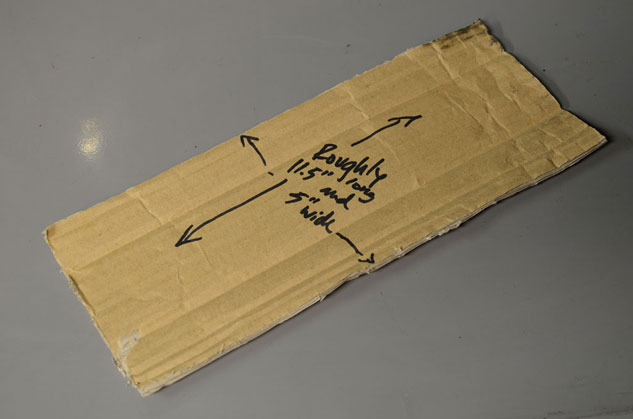
5 Before removing the oil filter, construct a small rectangular piece of cardboard to channel the flow of oil from the filter instead of just unscrewing it and dirtying everything on your bike underneath the filter. Depending on your bike's configuration, you may want to vary these dimensions, but most applications should find that a piece a little over 11-inches long and about five inches wide ought to be large enough to protect your bike from dirty oil and save you some clean up time later.
-
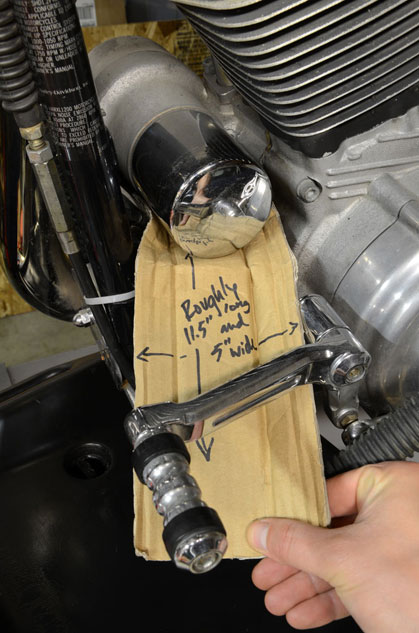
6 Slide the cardboard underneath the filter, and check to make sure it fits in all the way to the mounting surface for the filter because that's where it's going to start leaking out once the filter is unscrewed.
-

7 Place the drain pan underneath the oil filter (just in case) and the end of the cardboard. Unscrew the filter slowly and allow the oil to drain out over the cardboard and into the drain pan.
-
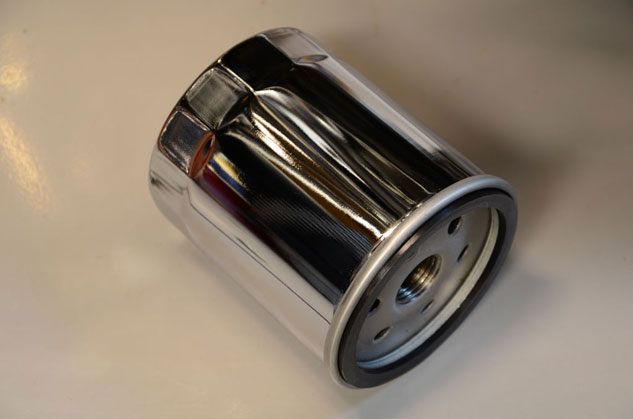
8 The new filter should resemble the old filter in size, shape, and especially the gasket surface.
-
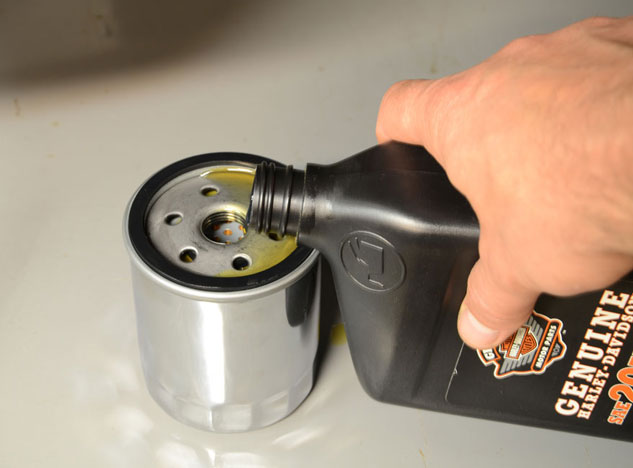
9 Add a few ounces of oil to the center of the filter but do not fill it. A filled oil filter will certainly make a mess during the installation process.
-
10 Apply a light bead of oil to the gasket surface of the oil filter so that the gasket will smoothly compress against its seat.
-
11 Install the filter by hand tightening it to the mount.
-
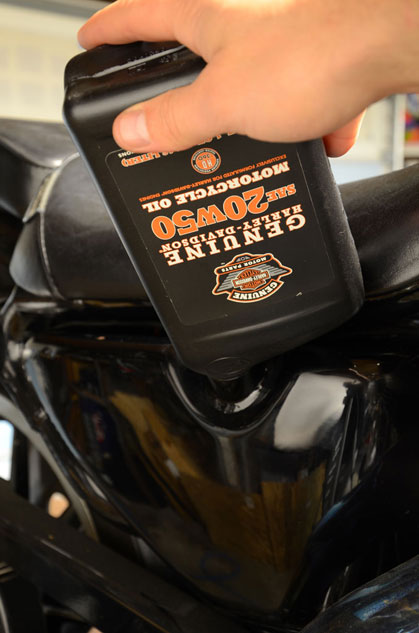
12 Add the factory recommended type and amount of oil. Sportsters require a little over three quarts of 20w50 oil.
-
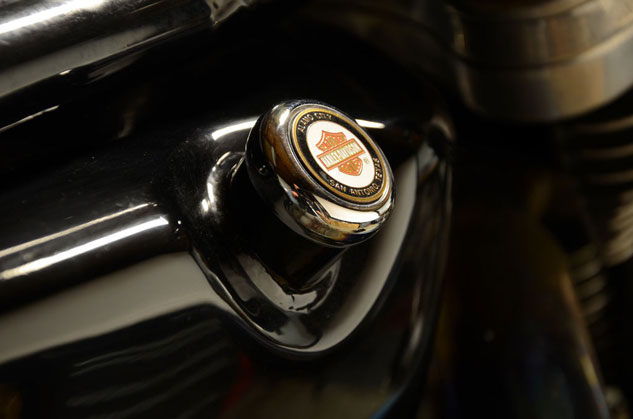
13 Replace the filler cap of the oil tank.
-
14 Finished!
Source: Greg Friend - Motorcycle.com
Durango Harley-Davidson® is conveniently located near the areas of Hermosa, Hesperus, Oxford and Bayfield.